A Mess Free Life may collect a share of sales or other compensation from the links on this page.
I’m not proud to admit that my kitchen pantry has gotten totally out of control. It’s an area in my house that seems to always get messy no matter how many times I clean it. My family is on a tight budget right now, and I don’t have the extra cash to go buy expensive kitchen pantry organizers. I need an effective but cheap way to organize my kitchen pantry, so I’m heading to my happy place, the Dollar Tree, to see what I can find to get my kitchen pantry back on track. Let’s give my kitchen pantry a Dollar Tree organization makeover!
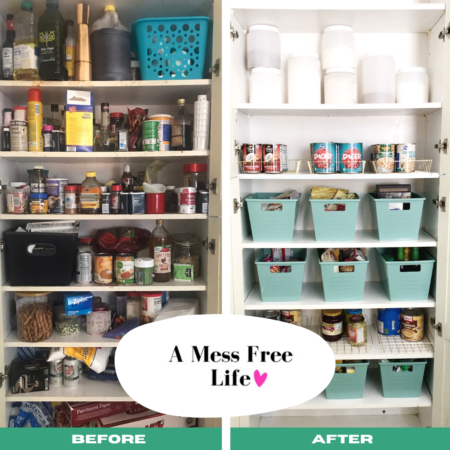
Is your kitchen pantry like mine? Let’s enter the “no judgment zone”, and I’ll give you a glimpse of my kitchen pantry situation. I’ve got half empty cereal boxes stuffed in every which way. I’ve got a chaotic shelf of canned goods that are probably not expired. (Probably? Insert terrified and embarrassed face here.) My kids put empty snack boxes back in the pantry, so when I reach for a snack, the box on the shelf leaves me empty handed and still hungry. (?!) A bit of flour spilled towards the back of the cabinet, but it’s so crowded in there that cleaning up the spill would mean that I would have to take everything out. I don’t have that kind of time, so the spill has stayed right where it is.
If your pantry needs a bit of a face lift too, follow along with my Dollar Tree kitchen pantry organization process.
Why is it so important to get your kitchen pantry organized? Let me explain.
-
Table of Contents
Messed = Stressed
I use my kitchen pantry every day. It’s where I store all of the ingredients I need to make my family’s meals. If I see a mess every time I open a cabinet door, I’m stressed. If I reach for a can of diced tomatoes, and it causes an avalanche of canned veggies on my head, I’m stressed (and maybe a little injured.) We want to eliminate areas of stress in our homes because life is stressful enough.
2. Don’t waste food
Food has gotten crazy expensive. We want to get every bit of value from the food items we buy at the grocery store, so we want an organized kitchen pantry that lets us see everything we have. My kitchen pantry is so messy that I bought a bag of almonds not realizing that I already had a bag of almonds hiding in the back shelf. I’ve also let things expire and go to waste because I didn’t have a system for storing food in my kitchen pantry. Need more tips for avoiding food waste and saving money on groceries? I’ve learned so much from the America’s Cheapest Family blog and books.
Let’s get started!
Pantry Dollar Tree Makeover Step #1 – Don’t get overwhelmed!
My kitchen pantry is really, really messy. When I open the cabinet doors, I take a look at the overwhelming mess and get the urge to run away screaming. Instead, I remind myself the way to eat an elephant is one bite at a time. My kitchen pantry didn’t get disorganized in a day, and it’s not going to get organized in just a few minutes. If you are like me and big decluttering tasks can feel a little too big to handle, take a few calming deep breaths. You can do this! The best way that I have found to tackle a big cleaning task is to set a timer for fifteen minutes. Work in your kitchen pantry for fifteen minutes, and then give yourself a break. Come back later and do fifteen more minutes. Repeat until the job is done.
Pantry Dollar Tree Makeover Step #2 – Understand What is in Your Kitchen Pantry
Let’s take an inventory of everything we’ve got in our pantry. Make an actual list if you want. I find writing things down with pen and paper to be helpful in situations like this where there is a lot going on. I’ve written down every item in my kitchen pantry – cans, brown sugar, oatmeal packets, applesauce pouches, pasta, beans, and more. Now that I see what I have, I know what I need to store and organize. Go down your list and decide what kind of storage container best suits each item.
I would like my breakfast cereal to go into a canister with a lid so that it doesn’t get stale. For my kid’s snack packets, I don’t think a canister would work. I probably need some sort of open bin for them to easily grab a snack and go. Decide what works best for you and your family, and make a note next to each food item on your list about what container you need to store that item.
Remember – Pinterest is awesome, and I love, love, love looking at pretty pantries on Pinterest, but while pretty is wonderful, we need our kitchen pantries to work for our families, so we want to pick kitchen pantry organization containers that are as functional as possible. Still need help deciding how to organize your pantry items? Check out this helpful post about how the best ways to store food.
Pantry Dollar Tree Makeover Step #3 – Head to the Dollar Tree
Yay! Now comes the fun part. Let’s go to the Dollar Tree with our list of the containers we need and see what we can find. I need about ten open bins, six canisters with lids, and some type of trays that can work for holding canned goods. It’s good to keep an open mind when shopping at Dollar Tree because they may not have the exact item you were envisioning, but they probably have something else that could serve the same function.
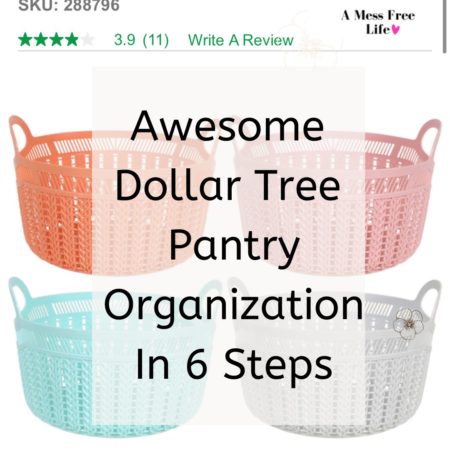
I found great storage bins for my kitchen pantry makeover in the area where they keep the storage bins and laundry baskets, but don’t forget to look around the whole store for other options. I didn’t think to look here at first, but the Dollar Tree aisles for office supplies, closet organization, and kitchenware all had useful items for my kitchen pantry makeover.
Pantry Dollar Tree Makeover Step #4 – Get a Clean Slate
We’ve got our plan in place, and we’ve got our bins and containers from Dollar Tree. Now we need to give ourselves a clean space to work with. This is the part that might start to feel overwhelming. Remembering that we can take a break every fifteen minutes if we need to, we are going to take everything out of our kitchen pantry. Yes, everything.
Like I said at the beginning of this post, this is a no judgment zone! If you have a can of peas older than your kid that just left for his freshman year of college, that is okay! Today is a new day. Throw away the old food items. Put the in-date food items you no longer want in a box, and give it to a local charity.
Once everything is out of your kitchen pantry, it’s time to give it a good scrub. I love a bucket of hot soapy water and a cleaning rag for this task. If you are feeling really fancy, the Dollar Tree also sells shelf liner paper in pretty prints.
Pantry Dollar Tree Makeover Step #5 – Fill Our New Kitchen Pantry
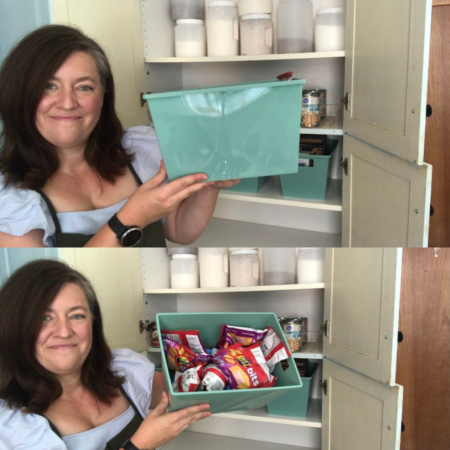
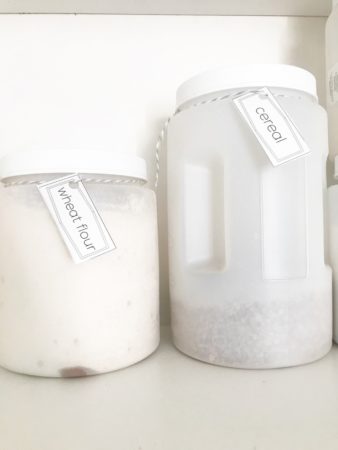
Now it’s time to put our food items into all of the storage containers we found at the Dollar Tree. I’m putting all of my baking supplies like flour, sugar, oats, and brown sugar into canisters with lids so that I can easily scoop out a cup of this or that the next time I am baking muffins. I am dumping all of the applesauce pouches that my toddler loves into an open bin and placing it on a low shelf of the kitchen pantry so that he can reach in and get a snack by himself. I decided to keep my pasta in its original package instead of pouring it into a canister, so my pasta boxes get placed in a bin.
I’m doing my best to group similar items in bins together. For example, my coffee pods, tea bags, and packets of hot cocoa mix get their own bin. Baking supplies with smaller containers like baking soda, baking powder, cream of tartar, and the gluten flour for my bread machine recipes go into the same bin.
Pantry Dollar Tree Makeover Step #6 – Labels!
Okay, let’s have some real talk. I have organized my pantry in the past, and it has not stayed organized. One of the main reasons for this is my family members, but before you think that I am throwing my darling children under the bus, let me explain. This fault here is totally mine! I organized my pantry with specific bins for different food items, and then I expected my family to be a bunch of mind-readers that knew where everything was supposed to go.
That was never going to work.
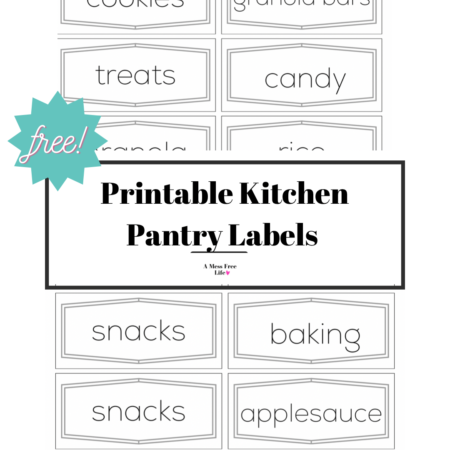
This time will be different because I’ve got a secret weapon – labels! I am putting a label on each container to let everyone know what goes inside. No confusion necessary, and they look pretty too! We’ve got a treat for you – free stuff! I just love free stuff. Sign up to get your free kitchen pantry labels printable so that your husband doesn’t put the oatmeal packets in the applesauce bin (Blowing an air kiss to my sweet and loving husband for letting me pick on him). Plus our labels are super pretty! I have laminated mine to give them durability, and I have attached them to my bins with mini clothes pins I found at Dollar Tree. Sign up to get your free printable pantry labels by going to our Free Resources page.
Pantry Dollar Tree Makeover Step #7 – You did it!
Woohoo! You did it. Your kitchen pantry organization mission is complete. Let’s stand back and admire all of our hard work. Our pantries are now stress-free, mess-free zones. We are going to be able to shop for only the food we need because we know what we already have. We are going to be able to use what we already have because we can see it and we know where it is. Good job! I’m so proud of us and what we got done today. Now go pour yourself a glass of iced tea. You’ve earned it!
Organizing my kitchen pantry with items from the Dollar Tree saves me time (I’m no longer looking for that can of mushroom soup I need for my dinner recipe that I could have sworn was in there somewhere), saves me sanity, and because I went to the dollar store, it saves me money too. Try out my process for kitchen pantry organization in your home and see the results. Post your before and after pics in our Facebook group!
Has this decluttering win got you ready to tackle other messy areas in your home? I’m feeling energized by the progress I’ve made in my pantry, so I think I’m going to read this post about decluttering my makeup drawer in my bathroom. Let’s keep that cleaning momentum going!
