A Mess Free Life may collect a share of sales or other compensation from the links on this page.
The family room is full of clutter, the mud room needs and overhaul and the dining room, well you can’t remember the last time you ran the vacuum in there. It’s time to throw open the windows and get down to overhauling these spaces by spring cleaning living and dining areas!
These rooms will become decluttered, functional and inviting to your family so they can come in and enjoy the space.
 spring cleaning your living and dining rooms. Bye-bye dirt and clutter; hello, peace of mind!” width=”700″ height=”700″ />
Table of Contents
Spring Cleaning Living and Dining Rooms
Make sure you take the time to get ready for spring cleaning by reading Strategies For Successful Spring Cleaning. You want to be able to prepare first so you can concentrate on the cleaning aspect of the job.
- Before you get started, gather all of your supplies together. Preferably you have a well-stocked cleaning bucket, if not make sure you don’t have to go looking for anything.
- Get your family on board helping to clean. Don’t know how? Try these methods that have been proven to work!
- Get the stereo cranking! It will help pass the time if you’re listening to uplifting music.
Cleaning Resources: Creating Your Cleaning Bucket
What You Need:
- Vacuum with attachments
- Mop
- Small bucket with handle
- Swiffer with extender pole
- Cleaning cloths (microfiber, cotton)
- Sponges
- Wood Polish
- Glass Cleaner
- Your favorite cleaners
Cleaning Resources: The Best Cleaning Tools To Get The Job Done Fast
Let’s Get Cleaning
1. Dust Down The Ceiling and Walls, Spot Clean or Wash Walls
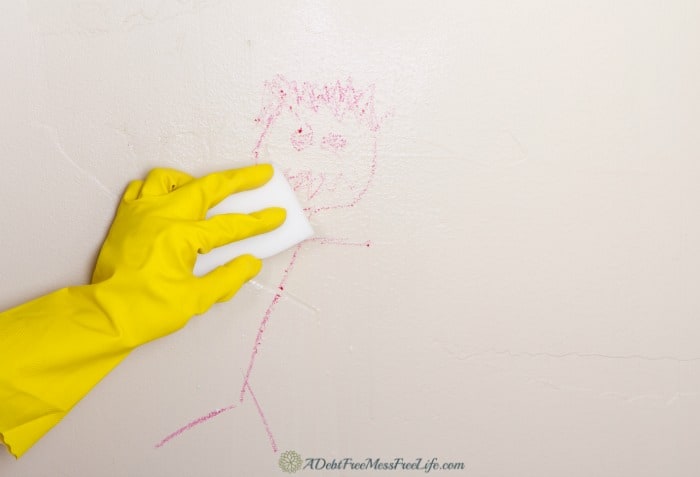
Using your Swiffer Extender Pole, dust ceilings, corners and walls. Determine if your walls need to be washed or just spot cleaned. Remember to wash air vents, doorknobs, doors, and switch plates. Walls will likely need to be washed more frequently in this room than any other. Pay attention to the places where people put their hands.
Cleaning Resources: Real Simple Tips and Techniques for Cleaning Painted Walls
2. Clean All Light Fixtures and Ceiling Fans
The ceiling fan in your great room maybe too high to reach without a ladder. Make sure you have someone there to spot you, don’t do this alone without help. Wipe down the blades with a damp cloth. Take down any other light fixtures and gently wash and dry them before replacing. Try using a fabric softener cloth to dust light bulbs and other areas where you don’t want to expose to chemicals or water.
3. Remove Window Treatments
Take down draperies, curtains, and blinds to wash or have cleaned according to the manufacturer’s directions. You might replace heavy curtains or drapes used over winter with lighter fabrics for spring and summer. Vacuum and clean windowsills and corners. Wash the insides and outsides of the windows. Take down and rinse off screens, before replacing.
Cleaning Resources: 8 Steps To Perfectly Clean Windows
4. Dust and Clean All Wall Hangings
Use a microfiber cloth or your Swiffer to dust down art and photographs. Occasionally these items may need to be washed. Wipe down with a slightly damp rag, being careful not to let any liquid seep behind the frame and damage the photo. Remove the glass if possible and wash in warm water to remove grease, dirt, and debris. Thoroughly wipe dry before putting it back into the frame.
Cleaning Resources: How to Polish Wood Like A Pro
5. Dust and Clean Couches and Chairs
Use your vacuum cleaner with the proper attachment to clean out couch crevices and under cushions. Flip cushions when done.
Clean slip covers and accent pillows according to directions. Some might be able to be washed, and others might need professional cleaning.
Use an upholstery attachment on a rug shampoo machine and clean couches and chairs if needed or hire a professional to clean them. You can usually find great deals on groupon.com. If they only need a light cleaning use an upholstery spot cleaning machine like this one here. Test first.
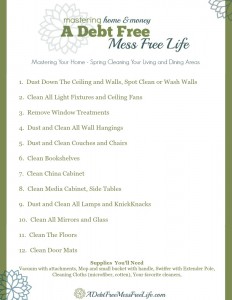
Grab the Free Checklist~
6. Clean Bookshelves
Remove everything off of the shelves. Did you declutter before you started cleaning? If not, you’ll need to decide what to keep and what to toss. You don’t want to just move the clutter just to put it back once you’re done cleaning.
Dust the inside and outside of the shelf. Using a damp dusting cloth, wipe down the entire shelf. Begin at the top and work your way down the inside and the outside of the shelf. Don’t forget the bottom shelf too.
Arrange items on the shelves. Make it look beautiful because a beautiful space is less likely to be cluttered with junk. Make use of decorative boxes and bins to hold things like MP3 gadgets, and the like.
7. Clean China Cabinet
Remove all china and if dusty, rinse using your delicate cycle on your dishwasher. Clean the inside of wood by dusting all wood. Polish if necessary. Clean all glass shelves and fronts with glass cleaner.
Polish outside of remaining cabinet. Replace and arrange china back into china cabinet.
8. Clean Media Cabinet, Side Tables
Unplug and dust down all the electronics. Check cords for fraying and wear. Dust down the television screen.
9. Dust and Clean All Lamps and KnickKnacks
Dust down and clean all accent lamps and knickknacks. Use a vacuum attachment or duster to clean the lamp shade, lamps, and any extra decorative items.
10. Clean All Mirrors and Glass
Wipe down all glass (not windows) and mirrors.
11. Clean The Floors
Vacuum and mop hard floors. Professionally clean carpet or rent a rug machine and DIY. This should be done at least once a year, twice is recommended, or vacuum and spot treat for mildly soiled floors.
12. Clean Door Mats
Clean the doormats both inside and outside the doorways. If they can be washed in your washing machine, great – give them a wash. Outside mats might be able to be washed with a scrub brush and soap. If not, consider replacing the outside mat if necessary.
Cleaning Resources: How To Control Dust In Your Home {And Other Dusting Tips}
That living room is worth living in now! The clutter is gone and it’s sparkling clean.
