A Mess Free Life may collect a share of sales or other compensation from the links on this page.

I’ve been in the process of redoing my house. It’s been a work in progress and it’s taken a few twists and turns. I always wondered about chalk painting furniture and thought now was the time to try.
After several years of a combined living room/dining room space that started out as a good idea, but turned out to be an under-utilized area, I switched things up and created a separate dining room.
I had the following pieces of furniture for this space:
- China Cabinet
- Table
- 4 Chairs
- 2 Parson Chairs
I needed another piece of furniture for in front of the window, and I wanted a piece that I could store linens and party supplies, and could be used as a side board.
It just so happens I had an old dresser downstairs in my basement just sitting there collecting dust.
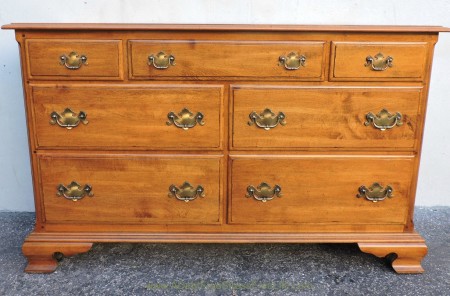
Unfortunately, I don’t have a before picture of the dresser, but will say it was your typical maple dresser from the ’60’s as pictured below. The difference being, my dresser had a total of 8 drawers.
Read Related Article: Furniture Polish – 5 Of The Best To Restore Your Furniture
I wanted to paint this piece a purple tone to match my color scheme in the room.
I searched Annie Sloan for the perfect color to no avail. Nobody had the exact shade I was looking for. The folks at the craft/paint store suggested I buy a jar of red and blue and mix it to the desired color, but honestly I didn’t think that was a great idea.
After searching awhile, I came upon a chalk paint recipe and decided to give it a try. Here’s the recipe I used:
Plaster of Paris Recipe
- 3 parts paint
- 1 part Plaster of Paris
- Water to mix
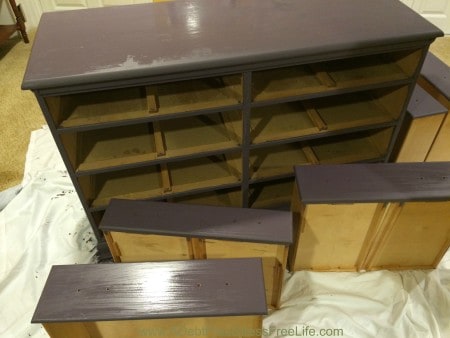
Mixing the Plaster of Paris and water, creating a smooth paste and then adding to the paint didn’t change the color of the paint at all. The consistency was exactly like chalk paint and I achieved full coverage with only two coats. No prep work was needed.
Here’s a picture after I put on the second coat of paint. As you can see it’s completely covered.
Once the paint dried, the next step was to apply the wax. I applied it as directed and polished by hand. This is the one thing I would do differently the next time. I would rent a motorized buffer instead of doing it by hand. I think the finish would have come out better.
My plan is to put another coat of wax on the piece this spring, and to purchase or rent an electric buffer to make the finish even better.
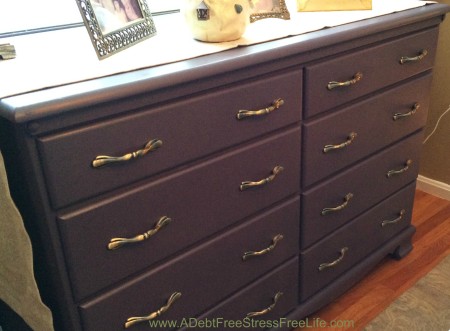
I needed to find some new handles for the drawers to finish the look. I went for these brushed gold tone handles that matched the overall decor of the room, and added a nice touch against the purple paint.
So the dresser is complete and I love the way it came out.
In the end, I ended up with a piece of furniture that looks terrific in the space and goes really well with the rest of the furniture and accessories in the room.
Here’s a breakdown of the budget:
- Paint – $17.00
- Plaster of Paris $6.00 (this will last forever)
- Drawer Handles – $2.37 a piece, $37.92
- Minwax – $9.98 ( I’ll be able to use this again for a few more projects)
- Grand Total: $70.96
Obviously, I have plenty of Plaster of Paris and wax to do multiple projects.
I’m already on the hunt for something else to paint. Looking forward to hitting up those flea markets so I can snag an amazing piece. I can’t wait for my next project!


