A Mess Free Life may collect a share of sales or other compensation from the links on this page.
**Some of the links below are affiliate links, meaning, at no additional cost to you, I will earn a commission if you choose to make a purchase. Thank you for your support in this way.
So you’re interested in starting a blog? Great~
If you’re anything like me, technology scares the s%*t out of you. The idea of setting up your blog probably send shivers up your spine and leaves you running for the hills.
Truth be told, I once relied on my best friend to help me do anything techie. When she suffered a medical issue earlier this year, I was faced with having to learn these things for myself.
I’m proud to say, I’ve learned a lot over the last several months. At times I felt like I was channeling her as I maneuvered through all the mind-boggling stuff I hate.
So if you’re like me, don’t worry; starting a WordPress site on Blue Host is super easy and will take you 15 minutes to complete the process. That’s how simple it is.
How To Set Up A Self Hosted Blog in WordPress
Let me explain…
The following steps outline exactly how I built my site, A Debt Free Stress-Free Life. This guide will help you get started.
When you’re done following these steps, you’ll have your self hosted WordPress site.
Over View
- Purchase hosting
- Choose a domain
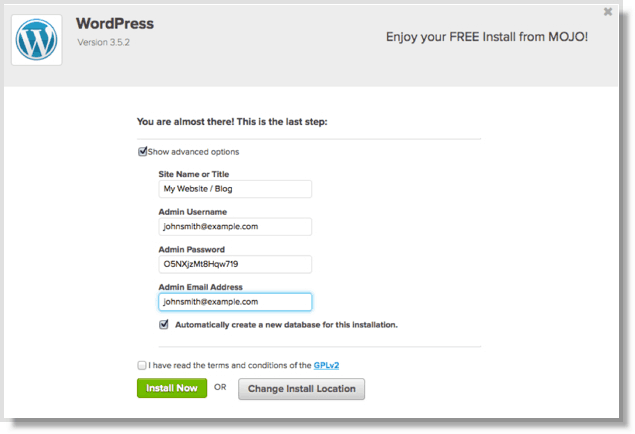
- Install WordPress
- Start using WordPress
How To Set Up A Blog In WordPress In 15 Minutes
Step 1: Find A Host
What’s hosting? A host provides the server space for your site so others can find you on the internet. There is free service hosting sites out there, but I highly recommend you go for self-hosting. There’s just too many issues if and when your site becomes popular with nonself hosted sites. You should start out with a self-hosted site from the get go. You get what you pay for, and ultimately free isn’t always free when it comes to time and aggravation. You’ll thank me later that you started out on the right platform.
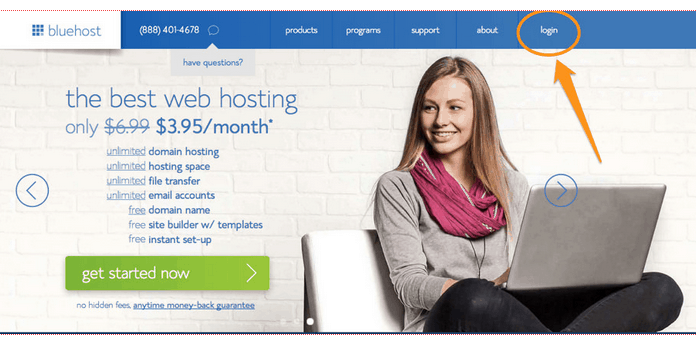
Start by clicking here to go to Bluehost (this link will open in a new window so you can reference these instructions). I can personally vouch for Bluehost as they are great to work with.
Click the green Get Started Now button.
Step 2: Select Your Plan
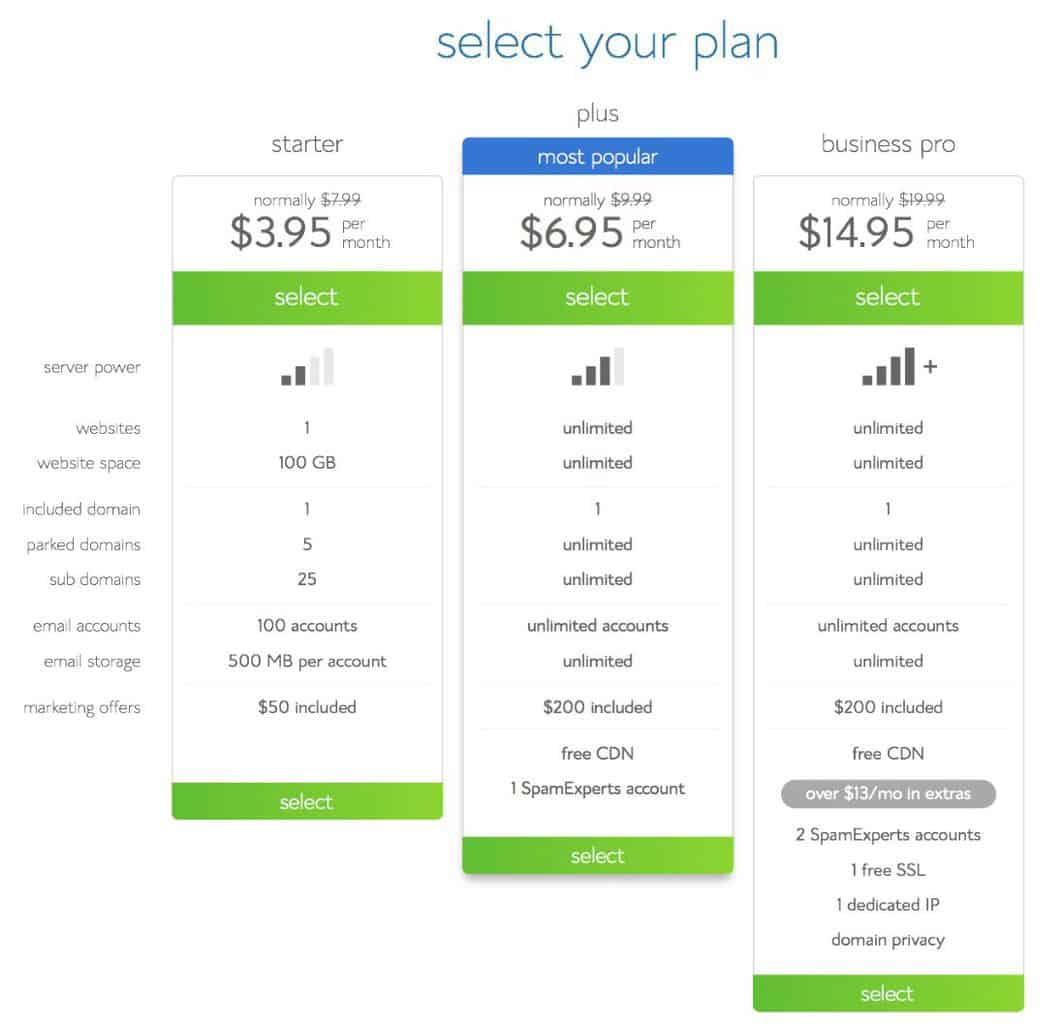
Choose the plan you’d like to start with; you can upgrade at any time. If you’re confused as to what might be the best plan for you, give them a call to discuss your options. When starting a new blog, I recommend the Plus plan because you get more unlimited features. All of the plans come with one free domain name.
Step 3: Choose A Domain
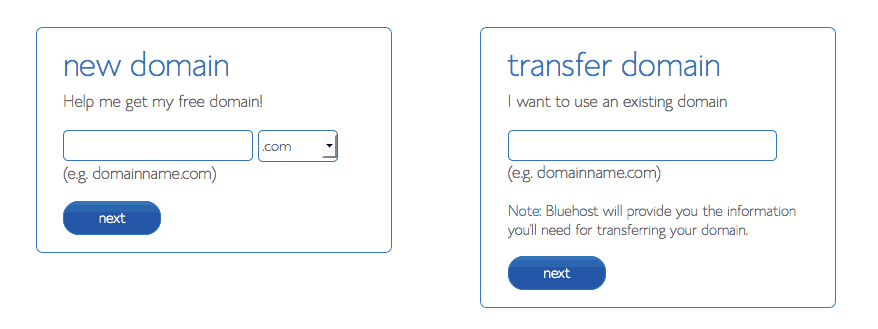
Next, you need to choose a domain name for your site. If you already own a domain name, you can enter it here. You’ll have to go through a few extra steps to make sure you get your DNS pointed to Bluehost. If you don’t already have a domain name, you can purchase one from the sign-up process. The best part – it comes free with your new hosting account purchase.
Here’re a few things to consider:
- Go with a .com whenever possible
- Make it easy to spell
- Make it easy to say
- Don’t include hyphens, numbers, obscure terms or confusing strings of words
- When in doubt, use your name to start
- Be creative
If you’ve already registered a domain name elsewhere, enter it on the right. This won’t mess up anything if you’re using a domain already; this only identifies your account.
 Click the blue Next button.
Step 4: Enter Your Account Information
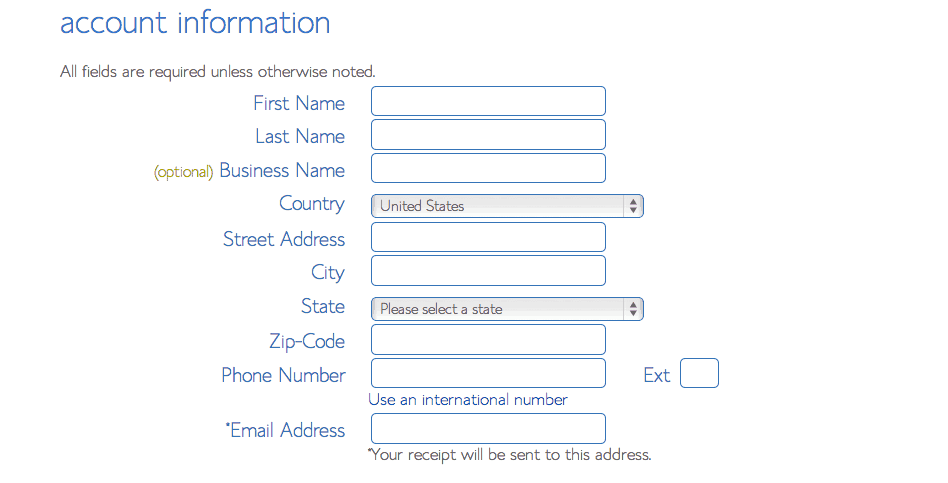
On the next page, you’ll enter your contact information including your email address. The email you provide is where information will be sent to you regarding the set up of your account and your login information.
Step 5: Choosing A Hosting Package
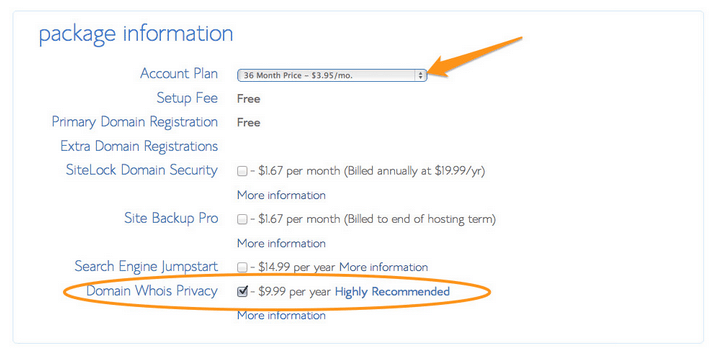
Choose which hosting package you want. Normal, shared hosting is priced at 12, 24 and 36-month terms. To help save you money, the longer term you purchase, the lower the monthly rate will be. By choosing a 36-month hosting term, you can get the great introductory rate of $3.95/month. Because you’ve chosen to host with Bluehost, if you ever need more than a shared hosting account, Bluehost provides seamless upgrades to VPS or dedicated server hosting accounts from inside your control panel. You can always call them to discuss your specific website hosting needs.
